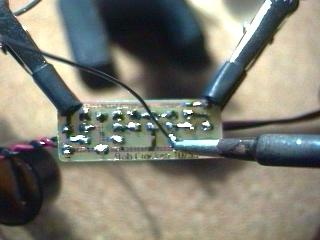
Soldering the Components to the Printed Circuit Board.
A solder joint involves using a chemical wetting agent (the rosin flux
in the core) and melted metal (the 60% tin and 40% lead alloy) to glue
together two items with a joint that is both electrically conductive and
mechanically sound. Ordinarily, this would not be a problemwith
enough heat, you can easily solder or even weld the metals together.
The difficulty is getting a good joint without toasting the immediately
adjacent heat-sensitive electronic components or insulation. This
requires optimum conditions for soldering.
Squeaky Clean
The parts have to be reasonably clean and free of corrosion, or the solder
will not flow smoothly and adhere to the surfaces. Most electronic
components come with leads already reasonably clean and pre-covered with
solder ("tinned"), and thus need no further attention. Make sure
no residual etch, etch resist, or corrosion is on the PCB (printed circuit
board), and that the PCB is free of wax and oil. Sand, wire brush,
scrape, use thinner, use rubbing compound, or use wax/silicone remover
at will. If you cant get a part clean and free of corrosion, throw
it away. Your soldering iron will also burn the rosin flux in the
solder, and this stuff will interfere with a joint as well.
Periodically "tin" the tip of the soldering iron so that solder flows over
it, then wipe it clean with a damp rag or sponge. If the flux reliably
burns (turns brown or black) on the soldering iron in the few seconds between
wiping the iron tip and starting the solder joint, the iron must be too
hot.
Heat Techniques
Since you will be using minumum heat to apply the solder, make sure that
both sides of the joint in fact get enough heat to activate the flux and
let the solder melt and flow freely. Press the tip of the soldering iron
against both sides of the joint. You can touch a bit of solder to
the interface between iron and PCB as well as iron and componant lead to
hasten heat transfer, but most of the solder should be applied not to the
iron tip but to the componant lead or PCB copper. You will
know that the temperature of the iron is right when the components briefly
cool the very tip of the iron below the melting point the solderfor a
fraction of a second the solder will stick to the junction between the
component and the iron tip. For the 1-2 seconds required to
make a solder joint, it goes
.iron tip and solder to junction of
PCB copper and componant lead, solder just starts to melt, then apply the
solder to to the other side of the joint. In a tight circuit board,
since componants can be heated several times while installing them, put
in the least sensitive (usually the cheapest) components first (like resistors),
intermediate sensitivity next (like capacitors), then more sensitive (transistors,
diodes), then integrated circuits. For very sensitive or expensive
components, consider soldering in a socket. If you are joining a
tiny component to a beefy component, start by briefly heating the larger
component first, then both, as the smaller component may overheat before
the larger is hot enough. A small alligator clip or a square of damp
cloth on the component can slow heating as well.
 The
Solder
The
Solder
If the componants are close or small at all, using small calliber solder
can help much with this process. I use 0.031 inch diameter solder,
which a little bigger than the smallest stuff that RadioShack sells.
Acid flux solder makes a great joint, but corrosion later is a serious
problem, so stick with the standard "rosin core" solder. A good solder
joint is smooth, shiny, and concave. Note that solder has a brief
delicate phase as it cools. If you move the joint while it is cooling,
the stuff crystalizes with a sort of amorphous pattern and the strength
and conductivity of the joint is compromised.
Unsoldering
The easiest way to remove a componant from a circuit board is to quickly
heat up the solder joints, and firmly pull the componant out with a pair
of needle nose pliers while the solder is still liquid. You can then
redrill the holes in the circuit board through the remaining flux and solder
and easily solder in a new componant with little heat exposure to the rest
of the board. If the componant has more than two or three leads (for
example with integrated circuits), you probably will have to laboriously
remove the solder from each lead and gently pop each lead loose.
Apply a short segment of "desoldering braid" across the joint, and press
the soldering iron through the braid to the joint. Resist the temptation
to scub the board with the iron and braid, as you will probably pry loose
the copper pads and traces from the board. As the joint solder melts,
it will wick into the flux-containing copper braid. You may have
to repeat the process several times and from several angles to get enough
solder off to pop out the component. Your efforts will be rewarded
with a brownish scum of burned flux on everything, but take a little 99%
isopropyl (rubbing) alcohol on a paper towel, and the flux rubs away without
too much difficulty.
Wires
For joints between wires, make sure that the joint is mechanically sound
before solder is applied. Ive seen wires soldered by laying the
two wires together and applying solder, but the solder can crack and peel
back under mechanical stress like old glue. Try to twist the wires
together first, then solder. If you are using solder to attach a
clevis to a push-rod, try to crimp the clevis first, then solder.
 Holding
the Parts
Holding
the Parts
I resisted buying a "helping hand" for years, propping the PCB up between
tools and other items on my desk. I finally bought one, and the two
adjustable alligator clips on little ball-jointed arms complete with a
magnifying glass on the thing really do make the job considerably easier,
and Id recommend one heartily. RadioShack sells one, "Extra Hands
with Magnifier" part 64-2063 for $9.99, but most hardware stores carry
some version of it. I put a short segment of heat shrink tubing on
each upper and lower jaw of alligator clips to keep them from scratching
the components.
Batteries
To solder batteries together, the best method is to use the batteries with
solder tabs already installed, and only solder the tabs together.
The large mass of a battery requires applying considerable heat to successfully
solder a wire directly to a battery endplate/terminal. Rechargable
NiCad batteries also have a pliable seal at one end to allow escape of
gasses generated during recharging. The temperature required to solder
is well above the temperature required to melt and damage the sealsolder
directly to the battery terminal and you definitely damage the battery.
A damaged seal means the electrolyte of the battery dries out prematurely
and the battery fails before it is due. That said, how can you solder
wires to a battery and minimize damage by minimizing heat. First,
remove a patch of the corrosion resistant coating from the battery terminal
with, say, a little 600 grit sandpaper. Solder will flat not stick
otherwise. "Tin" the tip of a hot soldering iron, and rub the flat
portion of the iron tip briefly on the battery terminal to "tin" the spot
of the future solder joint. If you are making a battery pack, tape
the batteries together. Use a spot of tape to hold a pre-tinned wire
in place on the terminal. Press the wire onto the terminal with the
iron with a little extra solder to make the joint. You can remove
the tape and apply final tape or shrink wrap as desired. Absolutely
do not solder directly to very small or "button" batteries. The contents
will expand in a non-expansile container, and can explode, making a fine
mess of corrosive material and possibly blinding you.
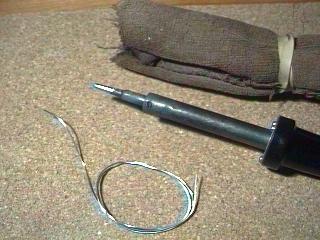
The Iron
Ive been using a good quality but simple Weller SP-40 40-watt pencil-style
soldering iron for years. When it breaks, Ill buy a nicer, adjustable
heat model with a stand and sponge. For now, I can loosen a set screw
on the tip, and pull in or out the tip to adjust the heat to a considerable
degreenot the case with those cheesy low-budget RadioShack models. Generally,
smaller components need less heat for a good joint, and reducing the heat
of the soldering iron gives you a little more working time before the component
overheats. If I need to do really fine work (like modifying a micro
servo or a receiver), I wrap a piece of 16 or 18 guage copper wire around
the tip of the soldering iron with the end of the wire extending forward
as the new, smaller, cooler tip. The larger pistol-grip style 100
watt solder guns are impressive (particularly the way they buzz when you
pull the trigger), but are difficult to handle and can get way too hot
for PCB electronics work.
Written by Rob Crockett
August 31, 1998.
Return to Electronic Projects page.
Return to home page.